
Auto-checking projects
Projects are full-fledged applications that the student develops independently from start to finish. As with every practical exercise on Hexlet, the project is automatically tested against the assignment's specified requirements. When a project passes the test, it is marked as passed in the student's profile, and you can continue learning.
How the automatic check works
To run the tests, you use a GitHub Action (hereafter, the action), which the system automatically adds when you create a project repository. The action "waits" for the student to go through all the steps of the project in the site's interface, and is activated at the last step when sending for review. Then, after each commit, the project is run through tests and a Hexlet linter.
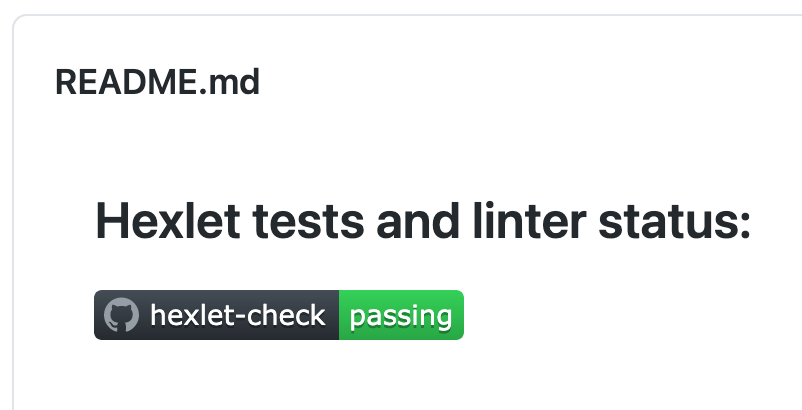
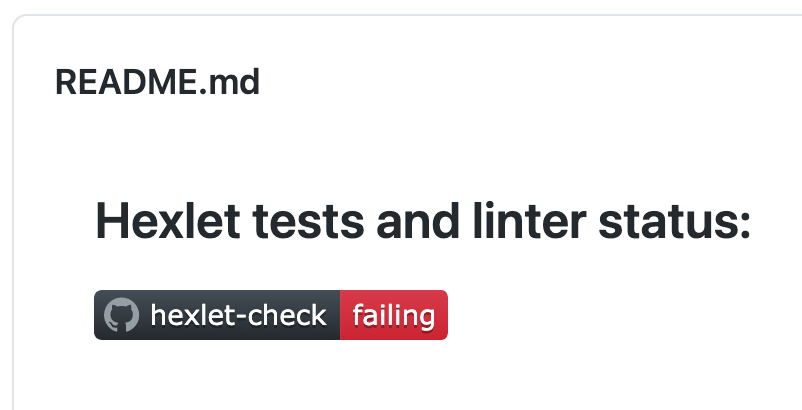
The check results are shown in the badge in the README of the repository, as well as in Actions → Workflows → hexlet-check. If all checks are passed successfully, the badge turns green and a green checkmark will appear in the action's results. If the tests or linter find errors, you will see a red badge and a red cross.
How to read the automatic checking results
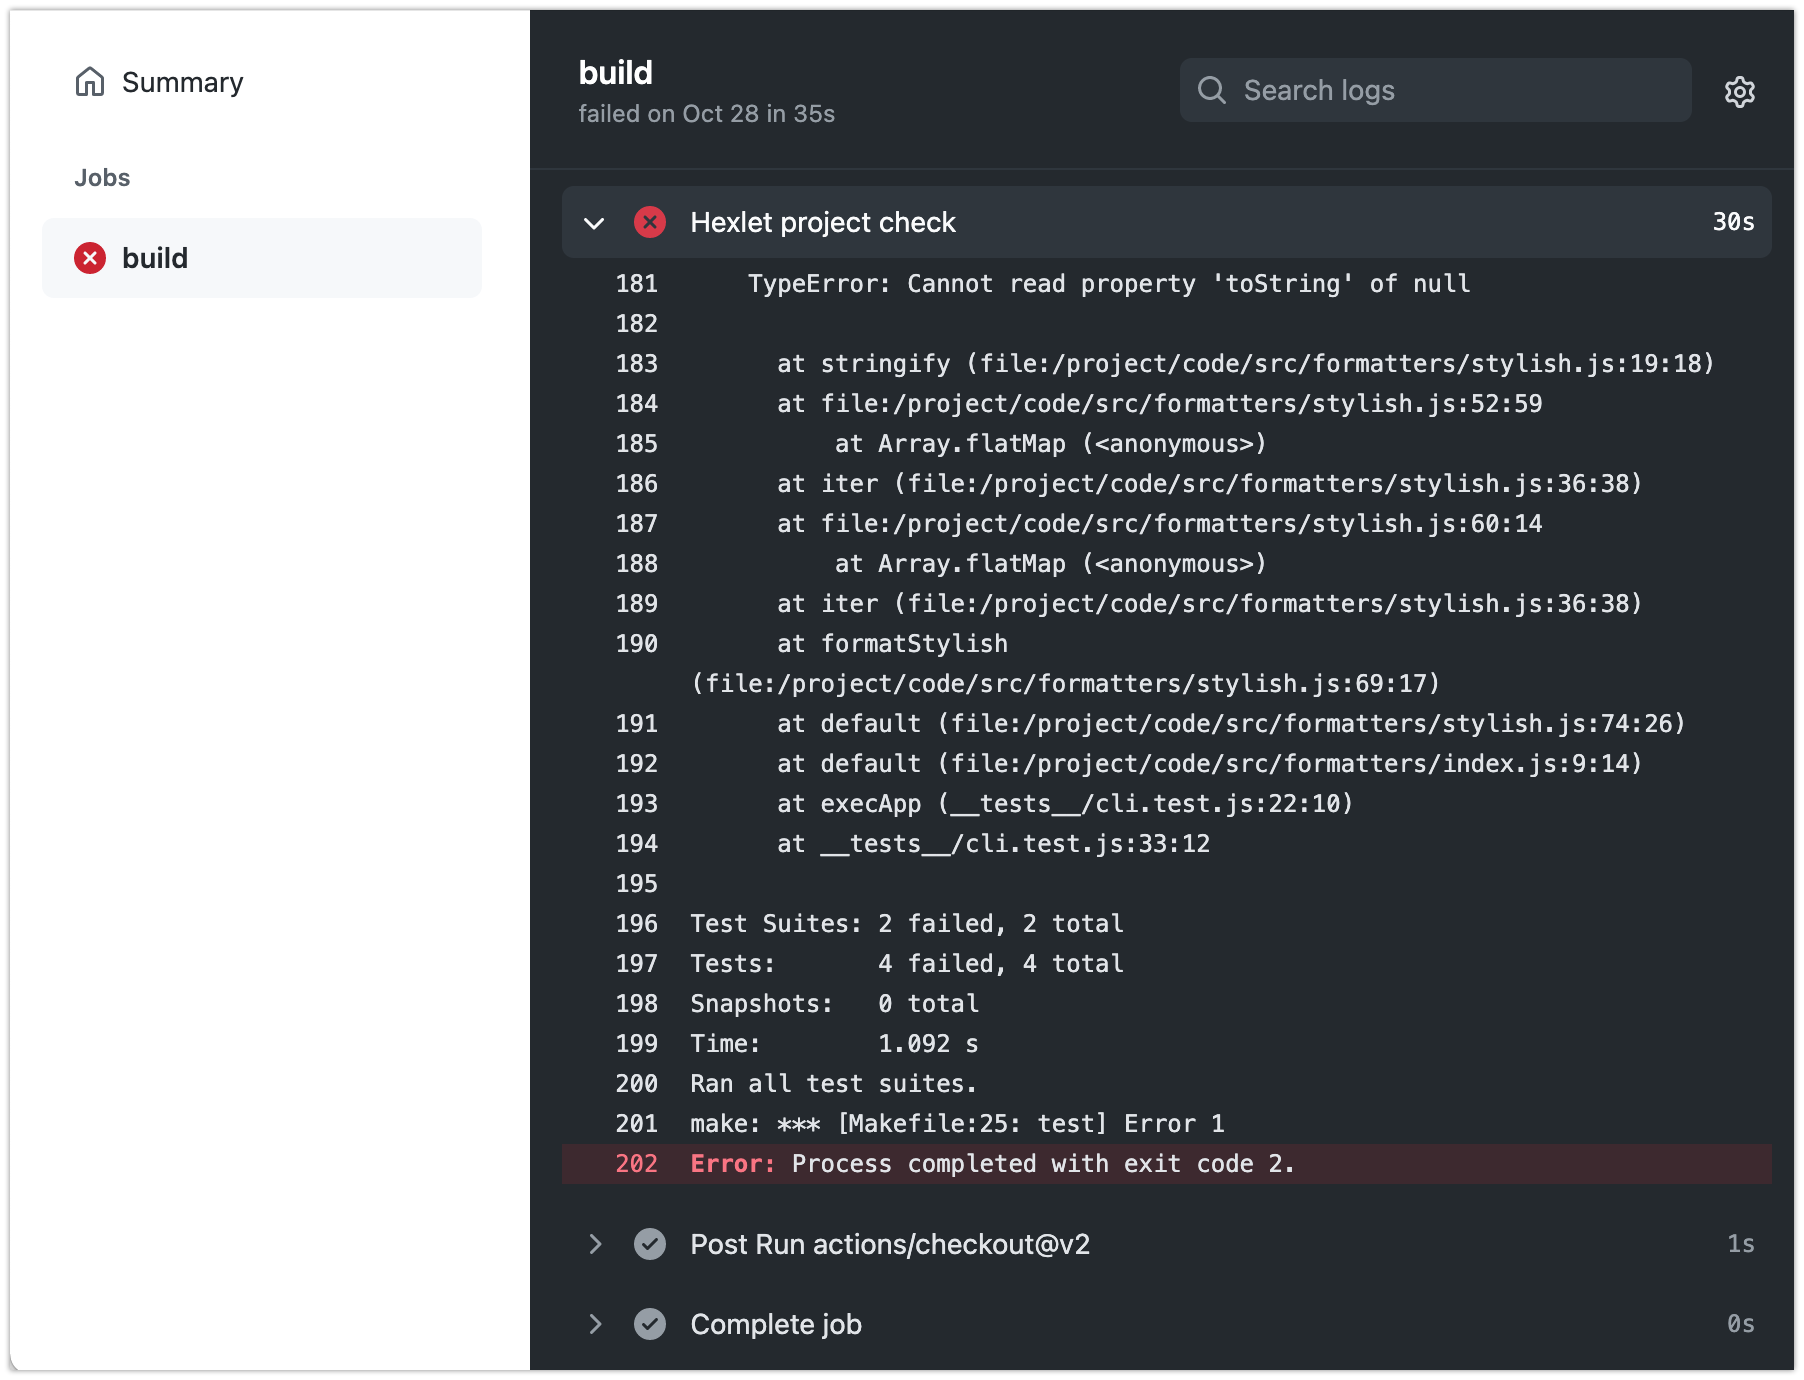
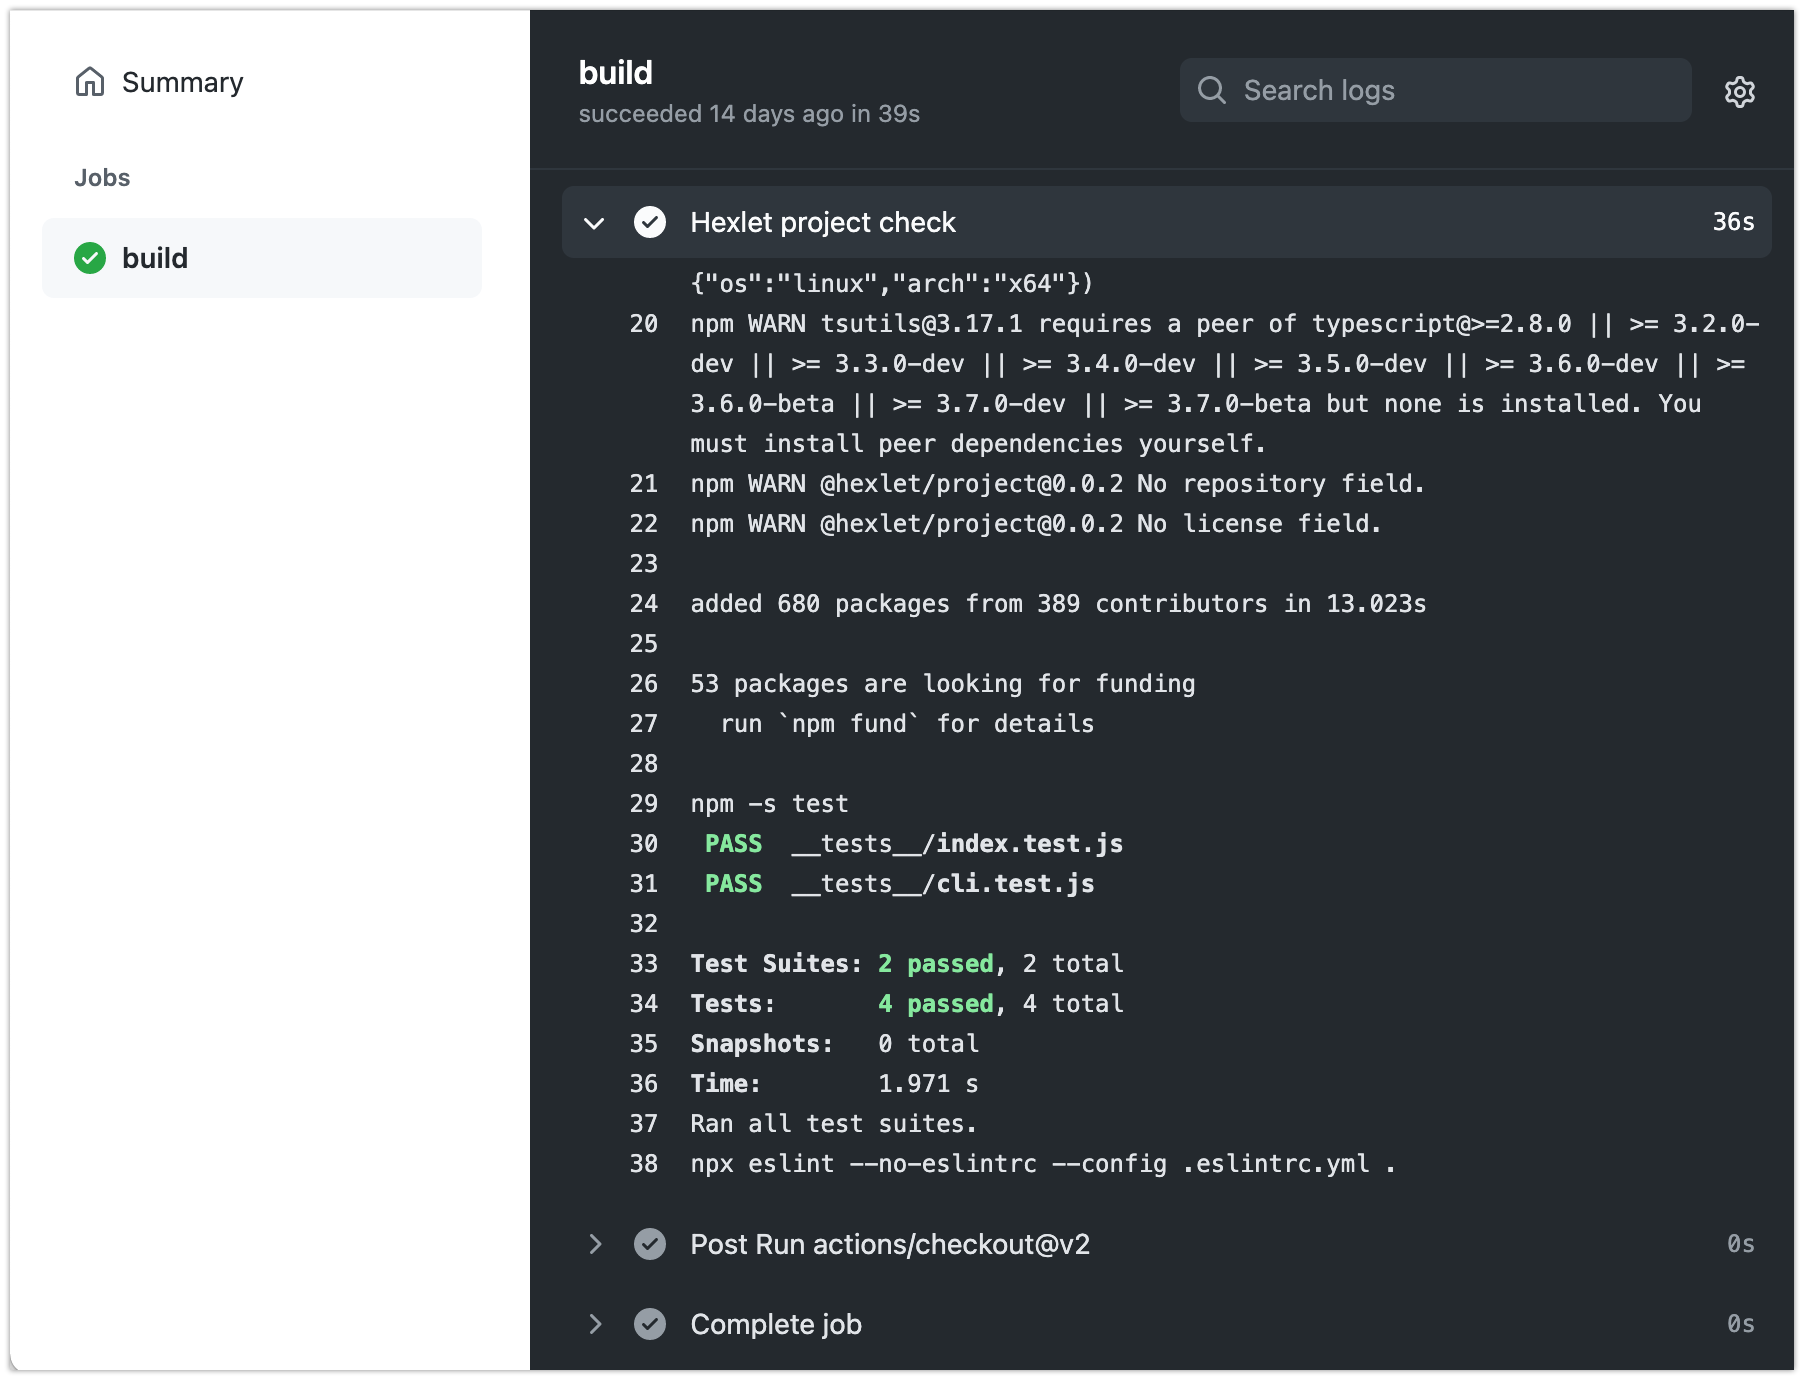
Go to the Actions tab, select the hexlet-check workflow on the left, and the results of running the action on the right.
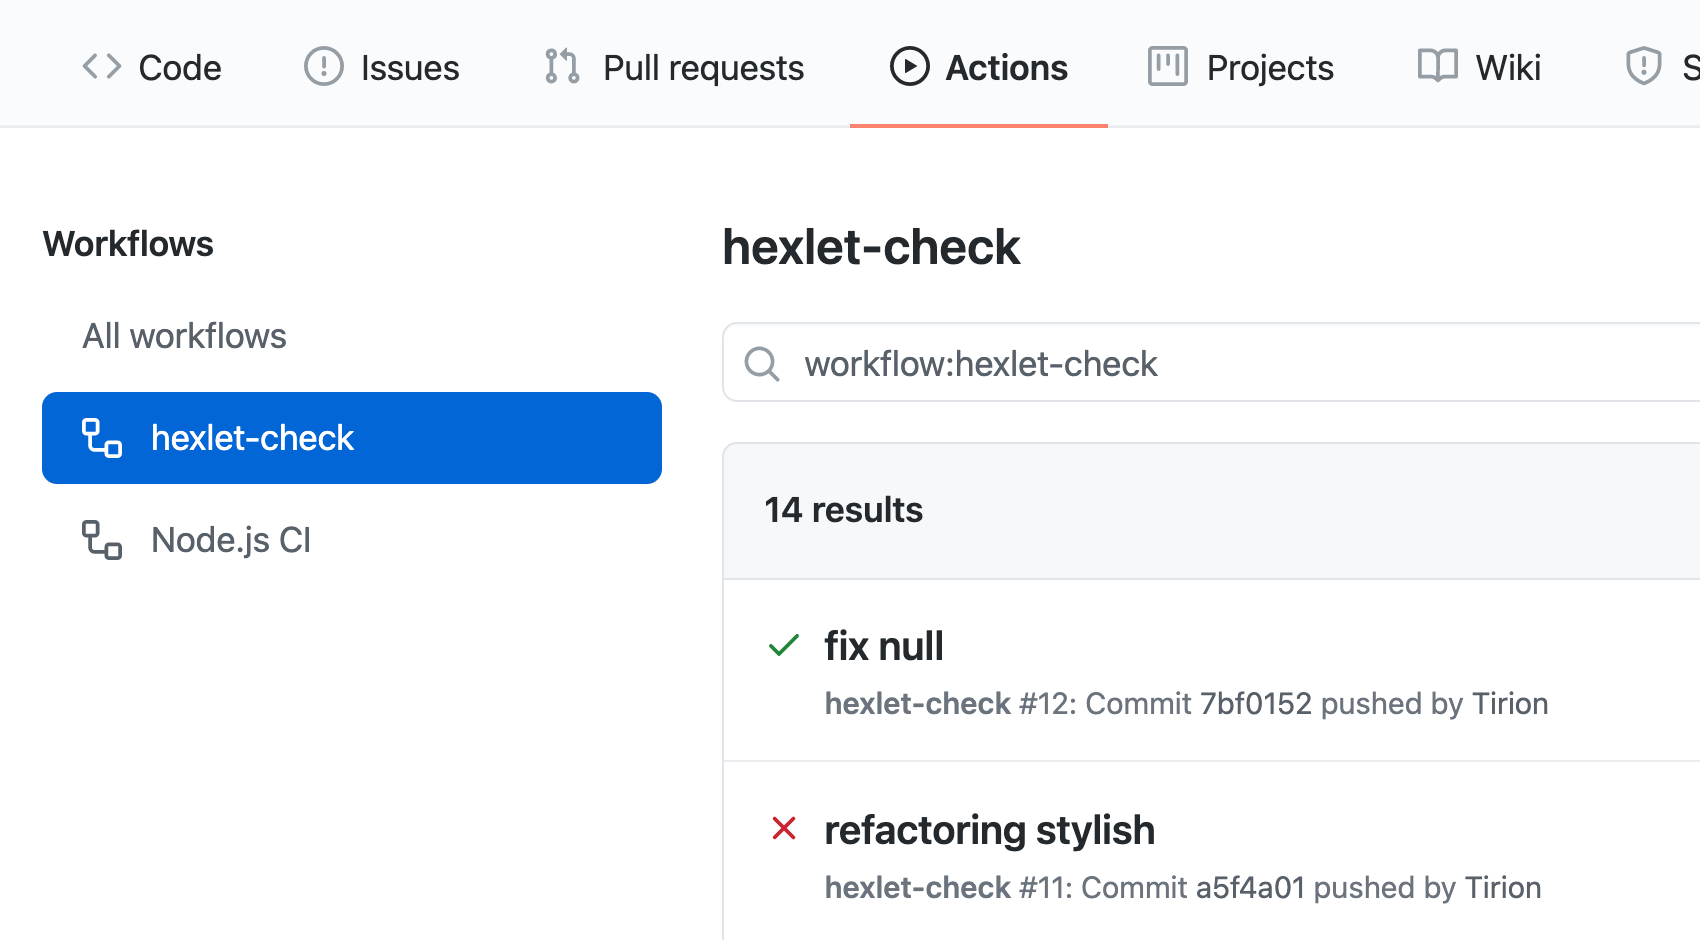
Here, for example, the action that fell on the refactoring stylish commit will be chosen..
On the left, in the Jobs block, you will see a 'build' job. Select it - the list of steps will be loaded on the right. We are interested in the Hexlet project check step.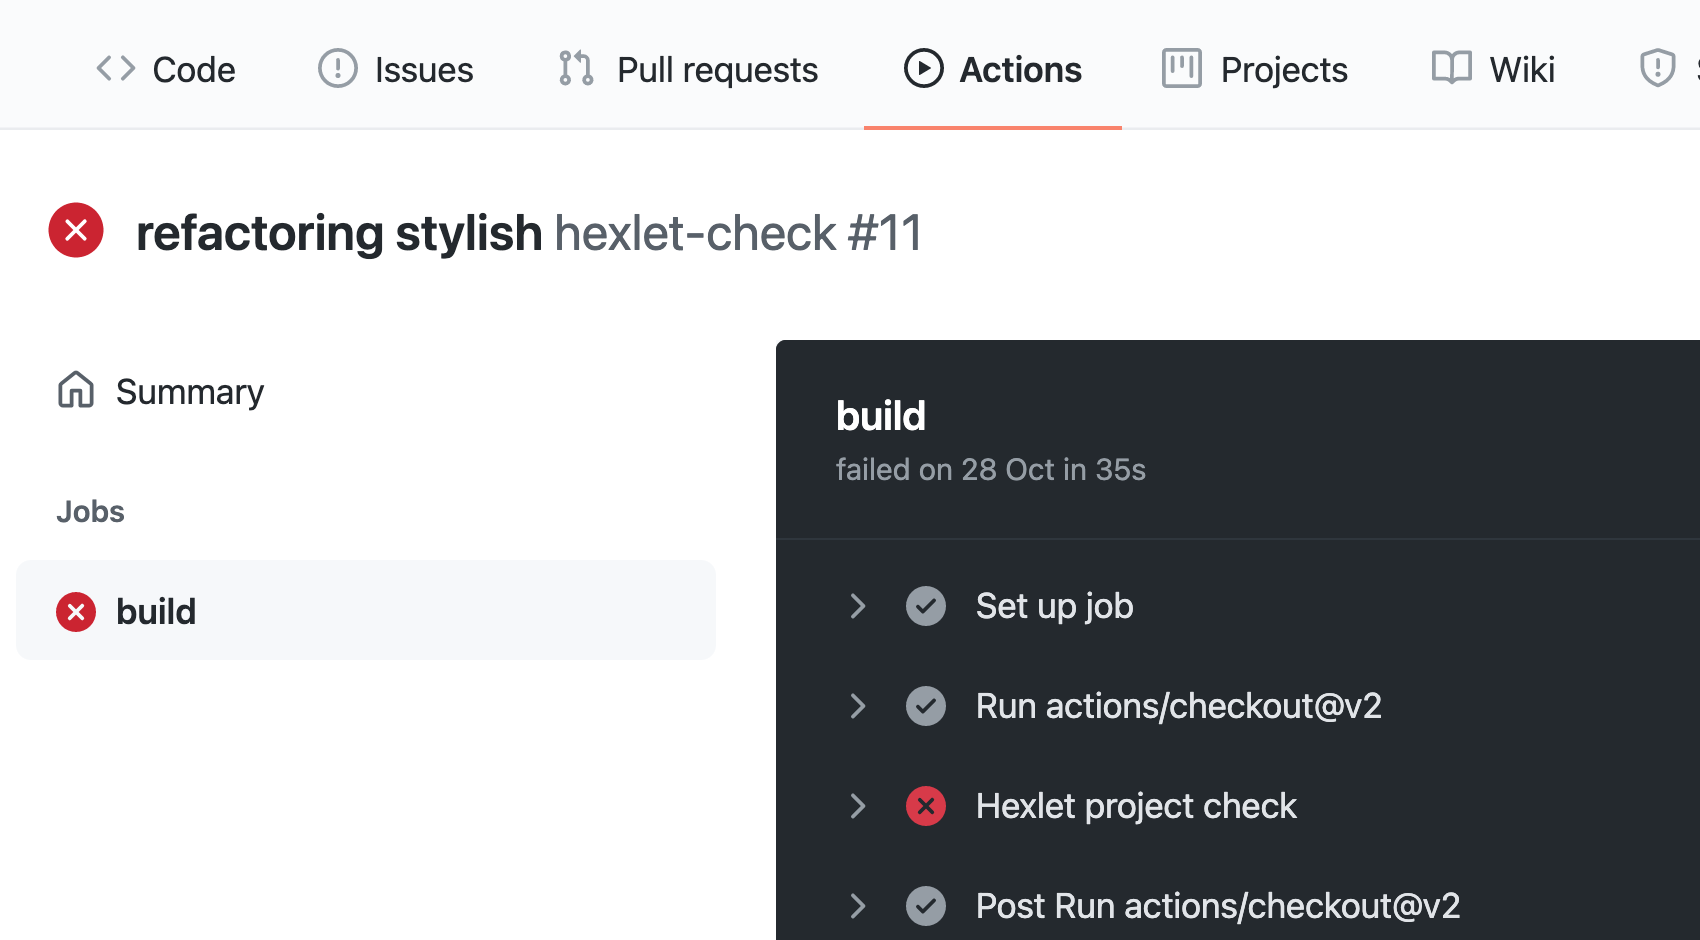
If you expand it, it opens a log showing everything that happened. The first few dozen lines are service information, you can skip them. Look for messages similar to the results of your specific project check. For example, this is what messages about tests that have crashed and passed will look like.
The second screenshot on line 38 shows the linter running - it found no errors.
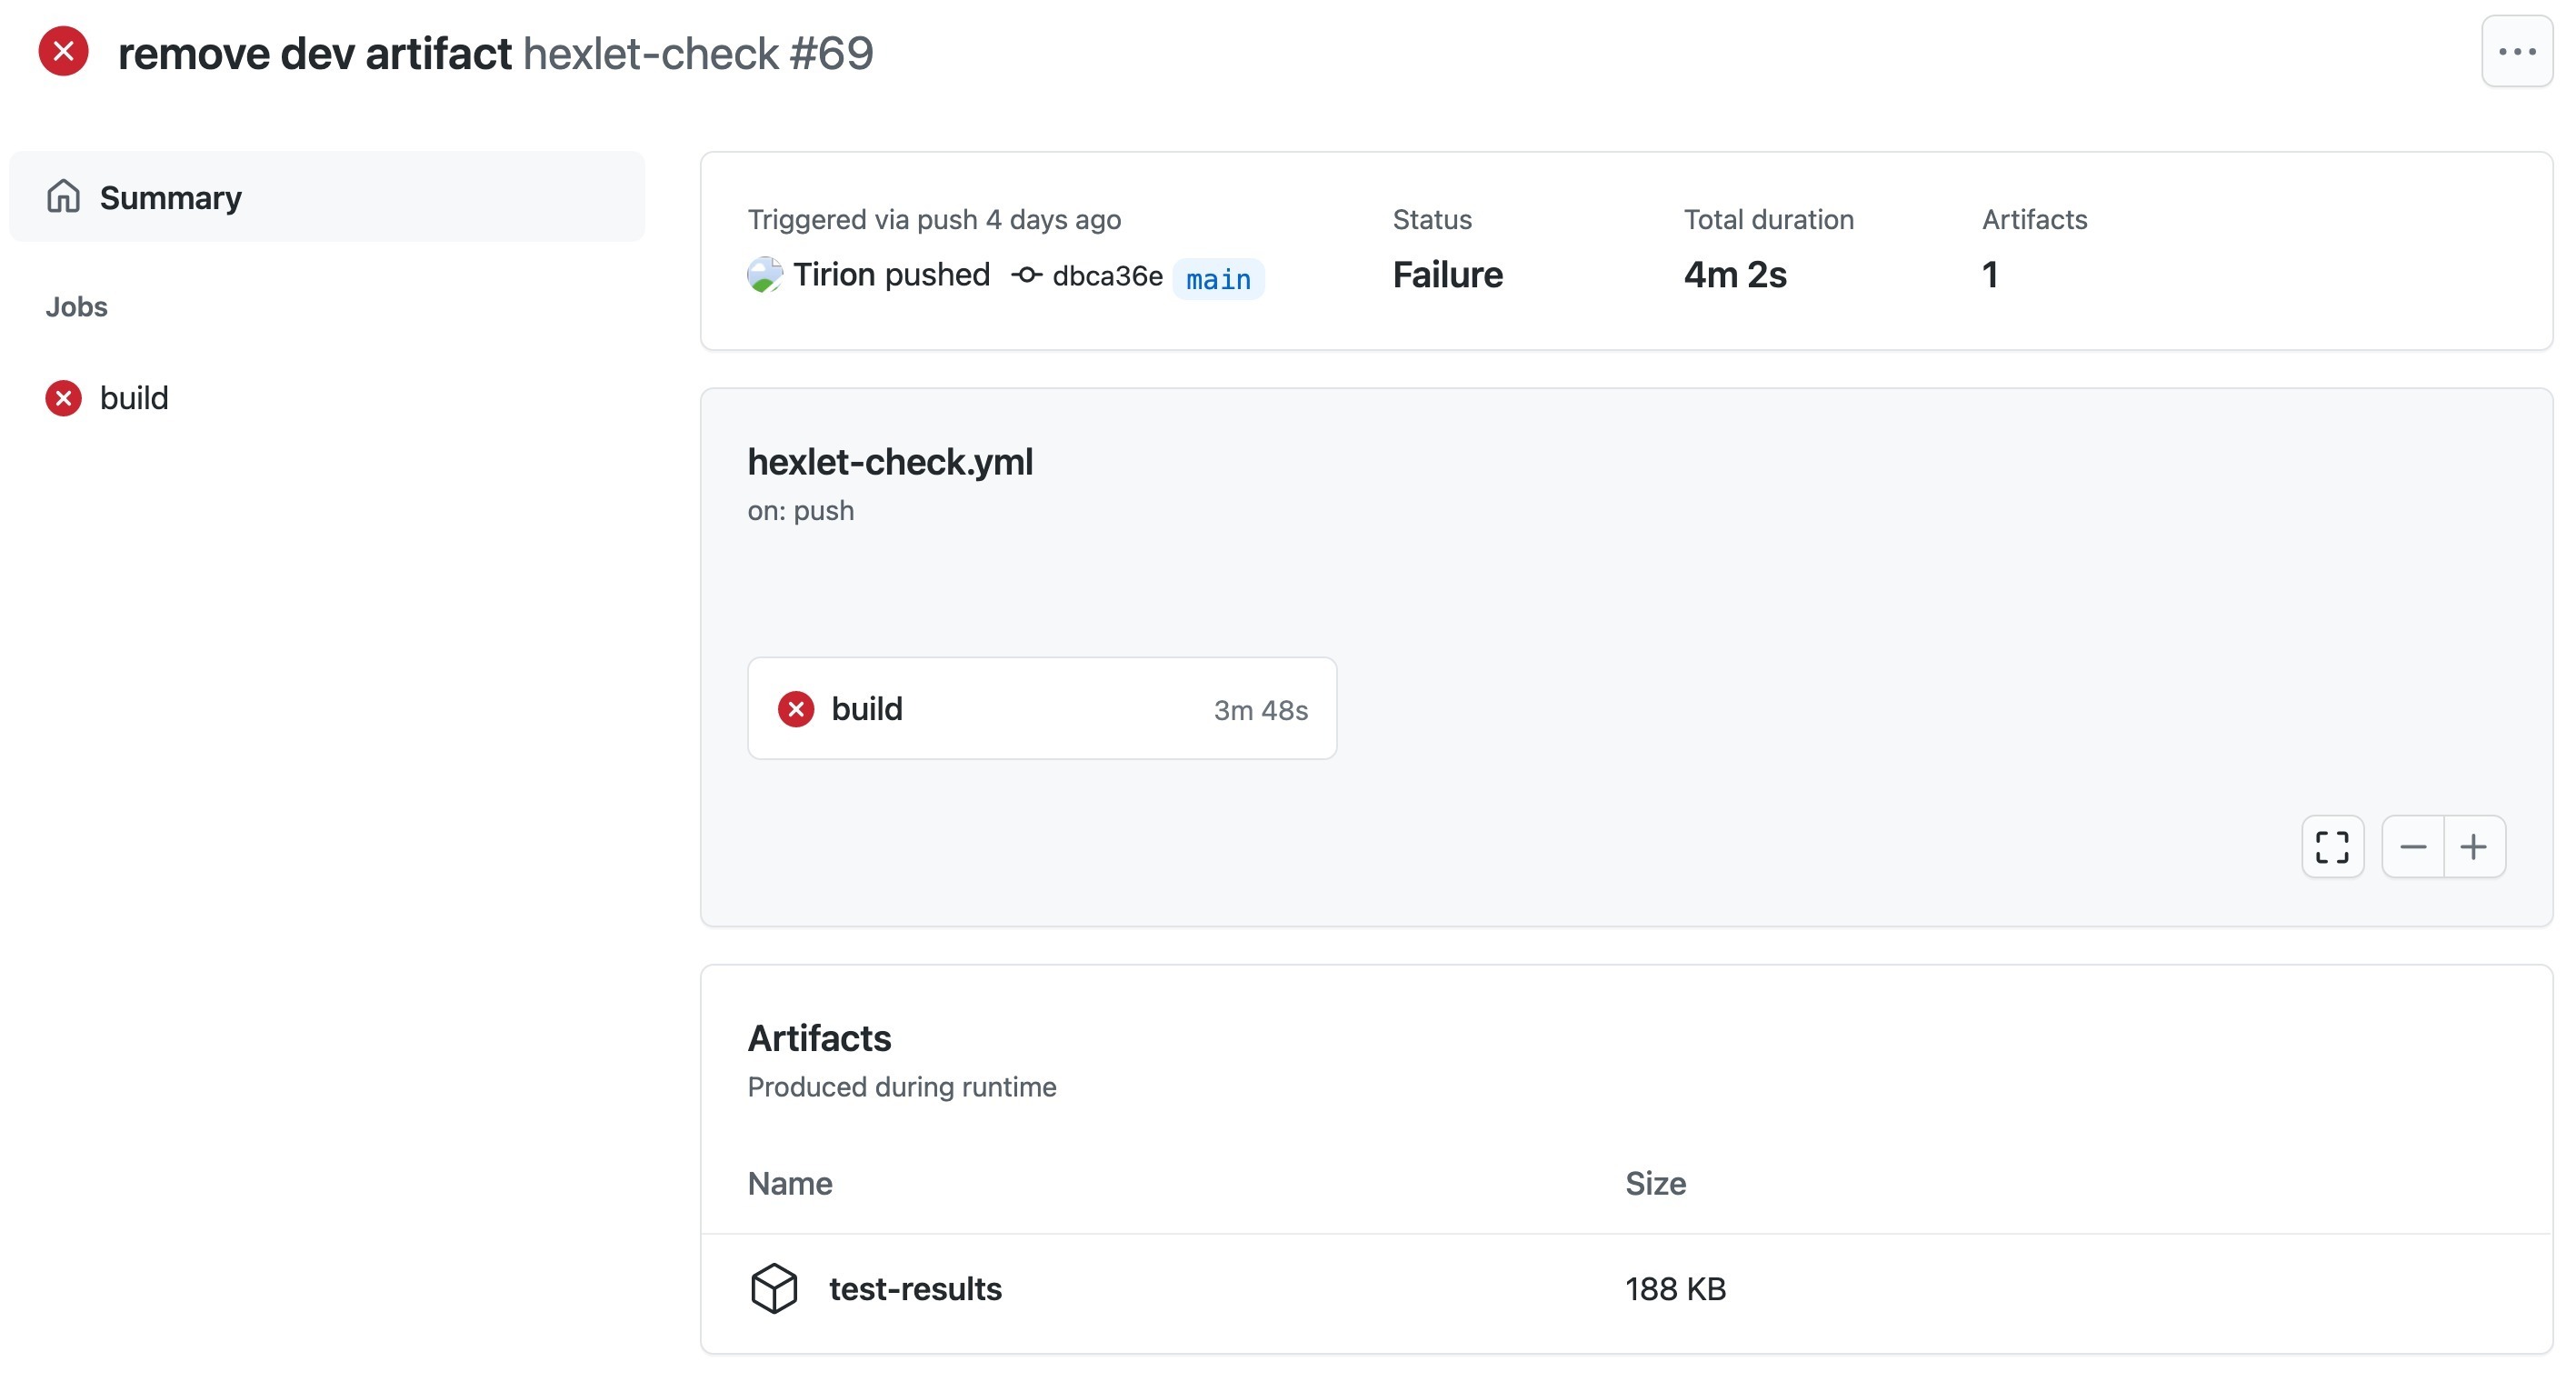
In projects with a frontend, screenshots of pages are attached to test results if they do not look as expected. On GitHub, these files are called Artifacts and are available for downloading at the bottom of the falling action page.
The HTML\CSS developer projects are only checked with screenshots; the master page is compared with the student page and the differences are identified. The result of the check is a three-part image: expected/difference/received.
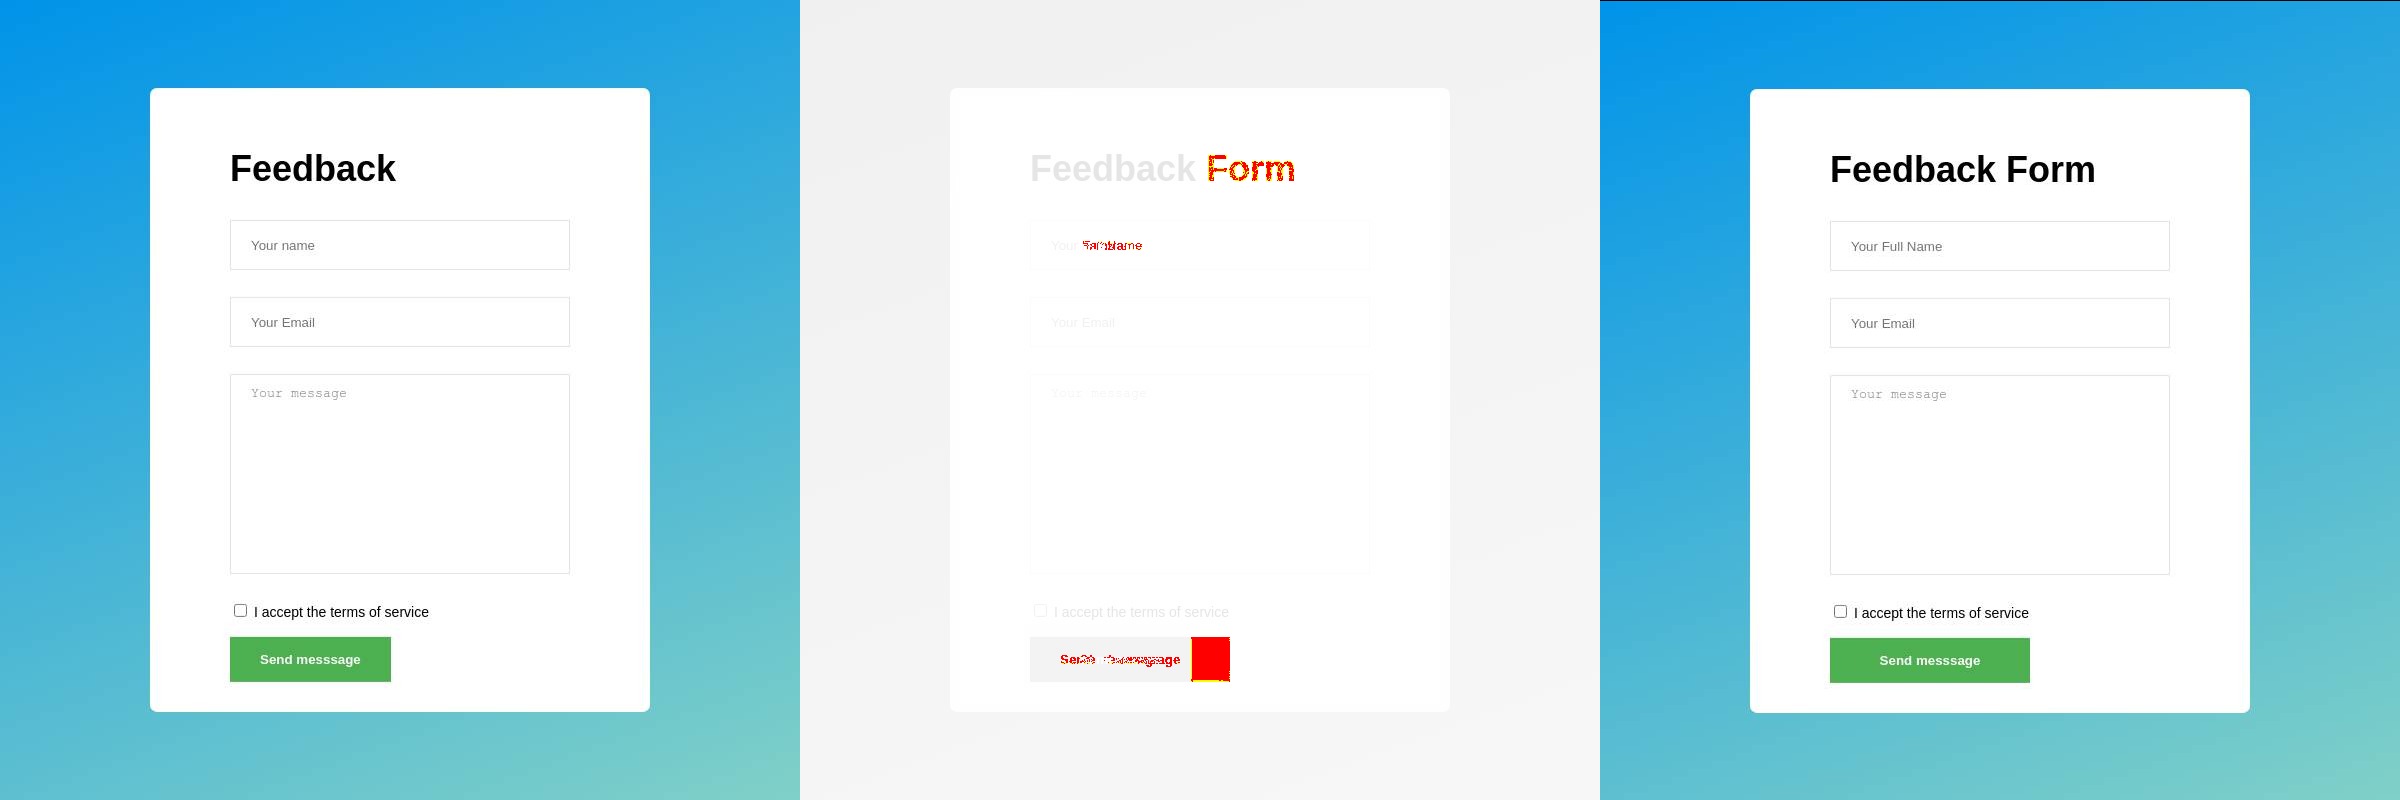
In the student's project (right), the page fragment is lower than expected (left), and there are also differences in the layout and design of the text. Anything different is highlighted in red in the screenshot in the middle.
How to debug your code
Debugging can be done in the same way as in the exercises - through a debug printing. Its result will appear in the general output, along with test results.
Pay attention to everything - texts, quotation marks, line breaks, etc. If you are developing on Windows, make sure that line breaks in the editor are set to LF, not CRLF. This is important because tests are run on Linux, and text values can be misinterpreted.
Some projects require you to use special libraries when debugging the application. These libraries are then "included" via environment variables when running automatic tests. For example: DEBUG=axios,page-loader npm test. The debug result is displayed with the test results.
In projects with a frontend, look at screenshots taken from artifacts. This will allow you to see your project just as the tests saw it.
Recommendations for completing projects
Complete each step of the project, strictly following the requirements, and move on to the next stage. Sometimes a task at the next step can lead to significant changes in the project architecture, and you will have to rewrite the previously implemented code. So the sooner you reach the final step with the minimum required functionality, the easier it will be to see the whole picture.
Projects are based on the covered material and provide resources for self-study. If a step's task is poorly worded or there is not enough information to complete it, post about it in the discussions - we'll improve the description and help you figure it out.
At each step of the project, you can ask questions to support. To get a quicker answer, refer to our "How to ask the right questions?" article when writing your question.
You can also ask questions about the project in our Slack in the #hexlet-projects channel - other students will answer you there.